Despite her criminal tendencies, I love me some Martha Stewart, especially her line of crafting tools and embellishments at Michael's. Over the last few years I've been stock piling button stickers from her line. I literally bought a pack every time I went into the store in fear that they would one day run out and my life would end. At some point I snapped out of this nutso behavior, and stopped buying once I had acquired 15-20 packs. Not something I'm proud of, but I want to give you a peak through the small window into my craft-supply-hoarding tendencies. ;)
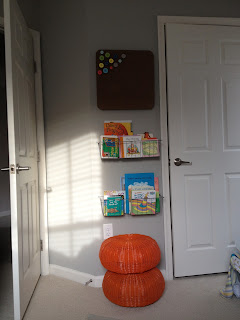
I hung a bulletin board over the baby's book shelves for future pictures and artwork, and I wanted to spice up the board in some way. I decided to make push pins out of the beloved button stickers - and fortunately, the project took a matter of 10 minutes.
Directions: (take notes, it's complicated.)
1. Take two matching stickers and stick them together so it's a double sided button with no sticky side.
2. Pull out the glue gun.
3. Put a small dab of glue on a normal push pin and smooshed that bad boy to the stickers.
4. Voila - button push pins!
Saturday, January 21, 2012
Leimabean Disaster
As many of you know, the baby picked up the name "Leimabean" pretty early on in the pregnancy. Honestly, I was pretty pleased to find a fun nickname out of our tricky last name. Once the nickname stuck, I knew that there would be some sort of craft project involving Lima beans for the nursery.
First, I tried cooking frozen Lima beans to see what they would look/feel like once they cooled/dried. Not pretty. Not craft project worthy. They would probably have grown mold on them by day 5.
I then went on the hunt for dried Lima beans. Giant didn't have them. Safeway didn't have them. I thought for sure Whole Foods would have them, but no luck. FINALLY I found some at My Organic Market. I brought them home, pulled out my blue spray paint and drop cloth and went to town.
I decided that the blue beans would be a cute "vase filler" for a few stalks of bamboo - and the project would take no time at all to pull together. Winner.
I bought my stalks, bought my vase and set up in the kitchen for what I thought would be a super easy project. I filled the vase halfway with the blue Lima beans, "planted" the bamboo and then filled the rest of the space with beans and water. It looked awesome and I checked the project off my list.
A few hours later I was admiring my work, and noticed that the paint was starting to chip off some of the beans. A tad frustrated, I figured that would happen a little bit since I didn't put a sealant on the paint. Oh well, still looked cute. I put the vase up in the nursery.
The next day I went into the nursery and found a bunch of blue Lima beans on the floor. At first I thought "Fraaaaaank" - b/c he's nosey, and has been especially curious of the baby's new room and toys. Then I looked at the vase and it was like all of the Lima beans had channeled the Incredible Hulk. The beans were growing and expanding and busting out of their blue shells. I was so confused, and then this college graduate had the lightbulb moment she should have had 3 days before - I was working with REAL beans that were used by 99.9% of the population for FOOD in soups and stews and normal recipes. When you add water to dried beans they are going to SOAK UP the water and expand.
Luckily I found a compromise - once I hacked the bamboo to freedom, the second round of this project consisted of re-filling the vase with marbles, and then putting that vase in a larger vase of DRY blue Lima beans. Not my brightest moment.
Wednesday, January 18, 2012
Flying Franks
Of all of the baby gear you pick up and acquire over your pregnancy, the one item I was most excited about getting (aside from the baby!) was the mobile. And I knew just the person for the job when the time came to mobile-up the nursery - miss Helen Greenstein. Helen has an awesome online business - Eleni Creative - where she creates and works with all things felt (think ornaments, capes, mobiles, stuffed animals, etc.).
I knew there was only one felty animal that could fly above our baby's crib... it had to be flying Franks! Check out the six-pack of felty Franks below...
 |
| The dog. The myth. The legend. |
Crayola Craftin'
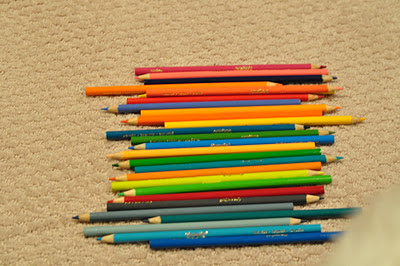
A few people have asked about the colored pencil project above the changing table. This was one of the easiest DIY projects that I've done over the years - and was inspired by a West Elm print I had ripped out of a catalog many years ago. The print was simple - a collection of colored pencils - I loved the bright colors and knew that I'd be able to recreate on the cheap. I also have a slight obsession with new school supplies - think fresh boxes of markers and crayons with perfectly pointy tips - so adding some Crayola to the nursery was a no-brainer.
I bought a cheap white shadow box at JoAnn's, picked a background color from the scrapbook paper section and bought a big box of Crayola colored pencils (which I used my 40% off coupon on :) ) I fueled up the glue gun, decided on the order of the pencils and carefully glued them down with the label up. I knew my unsteady hand would not be able to line them up perfectly in a square, so I decided to have the crayons lay a bit askew. I think the entire project cost less than $10 and it adds a fun layer of color to the wall.
Monday, January 16, 2012
Leimabean's Nursery
Ta-Da!! Mission accomplished. I finished the nursery before the Bean made his big appearance. (Insert major sigh of relief).
I'm so happy with how the nursery came together. The vision I had in my mind shifted and morphed over the last 8 months, but the final product is just right. I wanted a space that felt calm and soothing, yet really happy and cheerful. Over time I was able to find the right pieces to fit the small space, and I was able to wield my glue gun a few times to make some special "DIY" projects that add a really personal touch.
Believe me, I know a newborn does not need a room with all of these bells & whistles. He will not appreciate the specific shade of gray on the walls. He will not care that I had glue gun burns from securing colored pencils into a shadow box. But I figure, A.J. and I will be hanging out in there a lot - at all hours of the day and night - and I wanted the space to be a place that all three of us would enjoy. Besides, it was fun pouring love into the room where my little man will sleep and grow and wiggle and laugh (and maybe cry on occasion ;) ) A true labor of love.
I'm going to break the posts down into a few entries, because I feel a novel coming on, but here are a few pics from the Leimabean's new digs. More about the details to come soon...
 |
| The reading nook. The tuffets are from Land of Nod, and I stole the book shelving idea from Pinterest. (God bless Pinterest!) |
 |
| We needed a LITTLE side table to put near the chair, and this Urban Outfitters piece does the trick. The bamboo is planted in marbles and blue Lima Beans (funny story about them later.) |
For those wondering, we're just 2.5 weeks away from my due date...02/03/12. I'm super excited to meet the little guy, but have been staying pretty comfortable, and I think the babe is pretty comfortable as well. I have a feeling we'll be by-passing 2/3....
Subscribe to:
Posts (Atom)


